|
Building
Exhaust Headers
Here is how I built the headers on the
33% Cap. Note that I do not claim to be a skilled welder, nor am I
saying this
will work for your application. These are merely my experiences and
some tips you might find useful.
WORKING WITH RED HOT METAL AND MOLTEN SOLDER CAN
OBVIOUSLY BE DANGEROUS!!
DO THIS AT YOUR OWN RISK - I MAKE NO CLAIMS AS TO THE SAFETY OF THIS
APPROACH!!
33% Cap Main
33% Cap Canister Install
33%Cap Headers
33% Cap Flight Reports
|
|

History
Projects/Reviews
Carl Goldberg Falcon 56
MkII
Colombo Andersson 38% Extra
Hangar 9 33% Cap 232
Hangar 9 1.20 Cap 232
(Bob's)
Hangar 9 1.20 Cap 232
(Bill's)
Lanier 31.5%
Staudacher S600
Sig Kadet Mk II
Sterling Ringmaster
Thunder Tiger Fun
Tiger
Updated!!
Pics of Cool
Stuff
Crash
Pictures
Car Stuff
Updated!!
1989 Jaguar XJS
Updated!!
Random Thoughts
Links
Stuff for Sale
Contact
Bob
Bill
|
Safety First! Here is a list of what
I use and some things to consider: |
Safety Glasses or Full face shield
Gloves
Long pants
Long sleeve shirt
Closed-toe shoes
Bucket of water - Just in case and to cool parts
Clear area of flammable materials - including your cleaning solvent.
Vapors can flash.
Pay attention to where you point the torch when not actually brazing.
|
|
Get the right
equipment and materials (you may have to visit a welding store, I have not been
able to find 45% silver solder or hi-temp flux at Home Depot, Lowe's or
Ace.) You'll need various parts and pieces of stainless and teflon tubing. Get
some extra 90 degree elbows to make the little pieces required for slight
corners. I happen to use 25mm K&S from Amelung Modelbau. You'll
also need a bench vise, paper towels, pliers to hold hot parts. |

Mapp gas (not
propane.)
45% Silver Solder,
Hi-Temp Flux, lacquer thinner or other degreaser.

I've had much better success with flux that is labled "High Temp"..
|
|

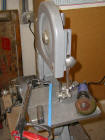
Cutting tool options: Bandsaw with
fine tooth metal cutting blade - my favorite. Also a muffler cutter
and a hacksaw with fine-tooth blade.
|
|

Finishing tool
options: Bench grinder with scotch pad disc (3M EXL deburring disc,
fine grade) from
MSC
Direct and a wire wheel. This scotch pad is the hot ticket in my opinion.
Also, you could use the wire wheel in hand drill or drill press, but as
we'll see later, it won't remove the slag or excess braze.
|
|

Prep the
aircraft:
Cover up the carb, make sure the pistons are covering the exhaust ports and
plug the ports.
Make sure the cans are mounted in their final positions, you'll use them as
a reference point when fitting the headers. They should be staggered
about the same distance as the exhaust ports, to ensure the headers are both
the same length. Bolt the flanges to the
exhaust ports, don't need to be super tight, just snug.
|
|
Cut
various pieces of tubing to correct length/angle. Try to keep all cuts
perpendicular to tubing wall. Otherwise, the hole in the tubing will
end up oval shaped and not fit well with the next piece in line. Each
piece of tubing has a "male" and "female" end.

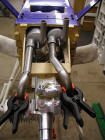
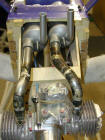
I start with a short piece at the head, use a 90 degree piece to judge the
height/length, and work back towards the muffler. In the pic above,
both headers are mocked up. Note the small, pie-shaped pieces used to
turn the final corner toward the muffler. These were cut off the ends
of extra 90 degree pieces. Take your time and get a good fit, it will
make brazing a lot easier. You should be able to get a "press fit."
If you have to hold pieces together, work on the ends and flanges a bit
more. You won't be able to hold them while you're brazing.
|
|

Disassemble, clean the flange and first short piece on the wire wheel or
scotch pad. Degrease - I use lacquer thinner. The parts have to
be absolutely clean, keep your fingers off the mating surfaces once you
degrease.
|
|

Flux the joint
and re-assemble all parts to ensure alignment is right.
|


Without moving the fluxed
joint, carefully disassemble and move to the vice. Note that the
joint is positioned so the the braze will run down into it.
Holding the braze on the joint, heat below the joint until the braze starts
to flow.
Move quickly around the joint, keeping the
heat up and the braze flowing. If you look down into the joint after
brazing, you should be able to see that braze has penetrated clear through to
the inside.
|
|

The next joint is cleaned and ready to flux and fit.
|

Fitting the next joint..
|

..and the next one..
|

A close look at the shallow bend cut from a 90.
Note that the flange on the straight piece has been tweaked a bit for a
better fit.
|

Here it is being fitted.. |
|

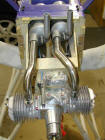
Here both headers are all brazed up.
Now, they would work perfectly fine like this, but you're probably thinking
"Gee, that's great Bob, but they're kinda ugly.." and I would agree with
you. So, we spend some time on the scotch wheel, and...
|

Ta-daa! The scotch-pad grinding wheel
is a life saver. I have tried to use a wire wheel, no dice. It
won't remove the slag and excess braze. You have to be careful while
buffing,
because the metal gets hot, and you don't want to grind through.
Patience and a bit of time will give you a really nice result. It will
still turn a bit yellow with use.
|
|
One slight headache with this particular
setup is the difference between the inlet and outlet sizes. The KS94
cans have a 30mm inlet. The only adapter I can find is 28mm to 30mm.
So I have to get the 28mm end down to 25mm to have a snug fit over the
header.
Another option might be to get a piece of regular 30mm ID tubing, it might
take the 25mm ID without being turned down. I just haven't tried it. |

What I do is take a piece of 25mm ID teflon (bottom) and turn it down on a
lathe to make a bushing (on the top right) with a 25mm ID and a 28mm OD.
On the top left is the 28mm to 30mm adapter.

Left: 28mm to 30mm ID adapter
Center: 25mm ID tube turned down to 28mm OD
Right: Stock 25mm ID tube. OD is about 30mm.
|
|

Wondering how strong a braze joint is? Here is a post-crash header.
Almost ever section of tubing is bent and twisted between every braze joint.
None of the joints failed.
|
|
|
|
|
|
|
|
|
|
|